ABOUT ME
What I Do
![]()
AUTHOR
Blogger and white paper author with the ability to put technical discussions into laymen terms for everyone to understand.
![]()
SPEAKER
Comfortable in front of audiences relaying technical messages into easy to follow presentations.
![]()
Developer
Develop solutions that enable efficiencies and consistency.
![]()
ANALYTICAL THINKER
Ability to develop dashboards and scorecards to assist in data analysis for proof of concepts and evaluations.
Work Process
DISCOVER
IDEA
DESIGN
DEVELOP
TEST
LAUNCH
Certifications
![]()
![]()
![]()
![]()
![]()
![]()
Fun Fact
10+ Million Square Feet Surveyed
100+ Talks & Podcasts
500,000+ Miles Flown
16 Certifications
RESUME
WORK HISTORY
Jan 2016 – Current
Managing Director
mobiadroit, llc.
mobiadroit provides independent vendor analysis for organizations as well as team training focusing on wireless networking. We also own and operate the No Strings Attached Show podcast, one of the wireless industries top podcasts.
May 2016 – Oct 2019
Lead Mobility Solutions Architect
Velaspan, Inc.
Responsible for developing advanced Mobility Solutions for our partners to deploy to their customers as well as developing our internal resources abilities.
July 2013 – Jan 2016
Wireless Solutions Architect
GDT
Develop growth opportunities and research new technology areas. Architect Cisco Unified Wireless Networks for Voice, Data, and RTLS solutions. Create bill of materials for customers. Maintain and develop opportunity bidding web application.
June 2011 – June 2013
Chief Wireless Architect
Allcom
Develop growth opportunities and research new technology areas. Architect Cisco Unified Wireless Networks for Voice, Data, and RTLS solutions. Architect AeroScout RTLS networks. Create bill of materials for customers. Maintain and develop opportunity bidding web application.
Oct 2007 – June 2011
Network Engineer II
Enventis
Designed and deployed Cisco Unified Wireless Networks for Voice, Data, and RTLS solutions. Designed and deployed AeroScout RTLS networks. Developed web based applications for Cisco IP Telephones, AeroScout MobileView API, and Cisco MSE API.
Sept 2006 – Oct 2007
Server Administrator
Taylor Development
Provided wireless management and setup of BlueSocket Wireless APs and controllers. Setup and maintained Microsoft Windows 2003 Servers in an Active Directory environment. Maintained an EMC CX300 SAN infrastructure. Designed and maintained a VMware ESX 4 node cluster supporting over 100 virtual servers.
May 2005 – Sept 2006
Network Administrator
Current USA, Inc
Provided wireless management and setup of BlueSocket Wireless APs and controllers. Setup and maintained Microsoft Windows 2003 Servers in an Active Directory environment. Setup and maintained an EMC CX300 SAN infrastructure. Designed and maintained a Citrix Metaframe server farm consisting of 7 Dell PowerEdge 1855 Blades. Created network equipment and fibre connection maps. Created web applications to manage Active Directory user properties, Citrix client printers, server management, network management, and a book library.
2001 – 2005
Info Tech Professional
Academic Distributed Computer Services
Provided first level tech support for data and telecom customers. Maintained and developed websites and web applications using PHP, MySQL, and Perl. Assisted with streaming video/audio and teleconferences using PolyCom’s. Created an online support document editing and management system with MySQL, Perl, and XML. Provided Linux desktop and server support.
2001 – 2004
Computer Tech/Programmer
University Computer Services
Performed software and hardware troubleshooting of computers for the University and general public in house and onsite. Assisted customers with used computer purchases from our show room. Developed replacement billing and service desk software for internal use using Perl and MySQL. Maintained Microsoft Windows computers with Norton Ghost Server. Researched and developed a two-way video communication solution for Pocket PC and Desktops for Fairview University Hospital.
EDUCATION
2014
Certified Wireless Network Expert
CWNP
Through rigorous training and real world experience I obtained my CWNE #152.
2011
Cisco Certified Internetwork Expert – Wireless
Cisco Systems
Through rigorous training and real world experience I obtained my CCIE #31229 (Wireless).
2004
B.a.s Information Technology Infrastructure
University of Minnesota – Twin Cities
I studied networking and server administration at the University of Minnesota. While there I worked in various departments providing a vast background of networking and systems management as well as programming.
BLOG
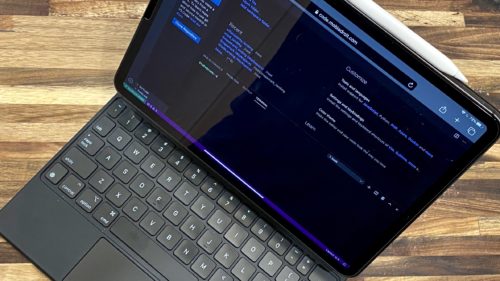

netAlly EtherScope nXG – The new goto device?
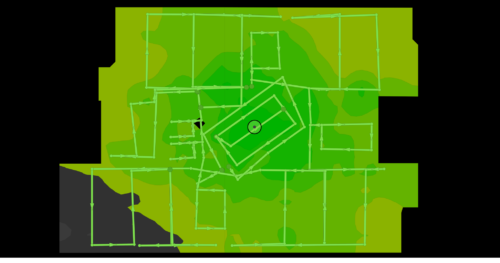
Surveying for Catalyst 9120
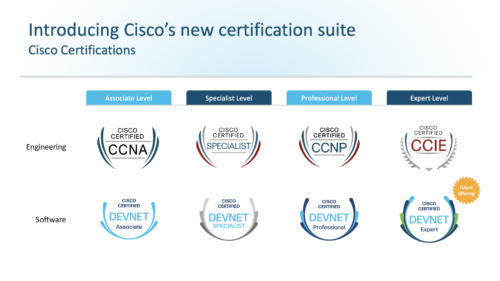
Cisco takes learning to the Next Level
RSSI Conundrum
A look back at the CWNE

Capturing Life From the FrontRow
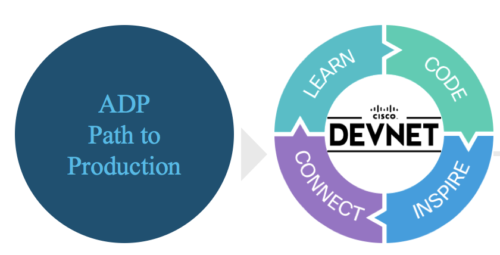
Cisco Aironet Developer Platform

CCIE Cont Ed Credits or How to milk your CCIE’s!
Welcome to Mobility Field Day 1

Where’s Waldo?
Cisco Mobility Express
Evolution of cradlepoint

You Are Here #WFD8
CONTACT
Let’s Socialize
Reach Me
based in Minneapolis, USA
blakekrone [at] gmail.com